If you’re wondering how to decorate a pumpkin cake for Halloween, you’re in the right place. Whether you want something quick and beginner-friendly or a dramatic 3D jack-o’-lantern centerpiece, this complete guide walks you through every method step by step.
Halloween desserts should feel festive, fun, and slightly spooky. A pumpkin-themed cake instantly becomes the highlight of your dessert table, especially for parties, school events, fall gatherings, or trick-or-treat celebrations. The best part? You don’t need professional baking skills to create something impressive.
From simple stencil designs to candy-filled surprise cakes, you’ll learn practical techniques, creative ideas, and pro tips to make your Halloween dessert unforgettable.
Quick Answer: How Do You Decorate a Pumpkin Cake for Halloween?
To decorate a pumpkin cake for Halloween:
- Frost your cake with orange buttercream.
- Create vertical ridges to resemble pumpkin lines.
- Add a green stem using a cupcake or ice cream cone.
- Pipe a jack-o’-lantern face using black icing.
- Finish with vines, leaves, candy, or spooky accents.
This simple method works for both flat round cakes and 3D stacked cakes. Now, let’s explore each decorating style in more detail so you can choose the one that fits your skill level and party theme.
Beginner-Friendly Pumpkin Cake Decorating Ideas
If you want fast, easy results without specialty pans or advanced piping skills, these ideas are perfect. They require minimal tools and still deliver strong Halloween vibes. Adding cake toppers and candles can also help.
1. Powdered Sugar Stencil Design
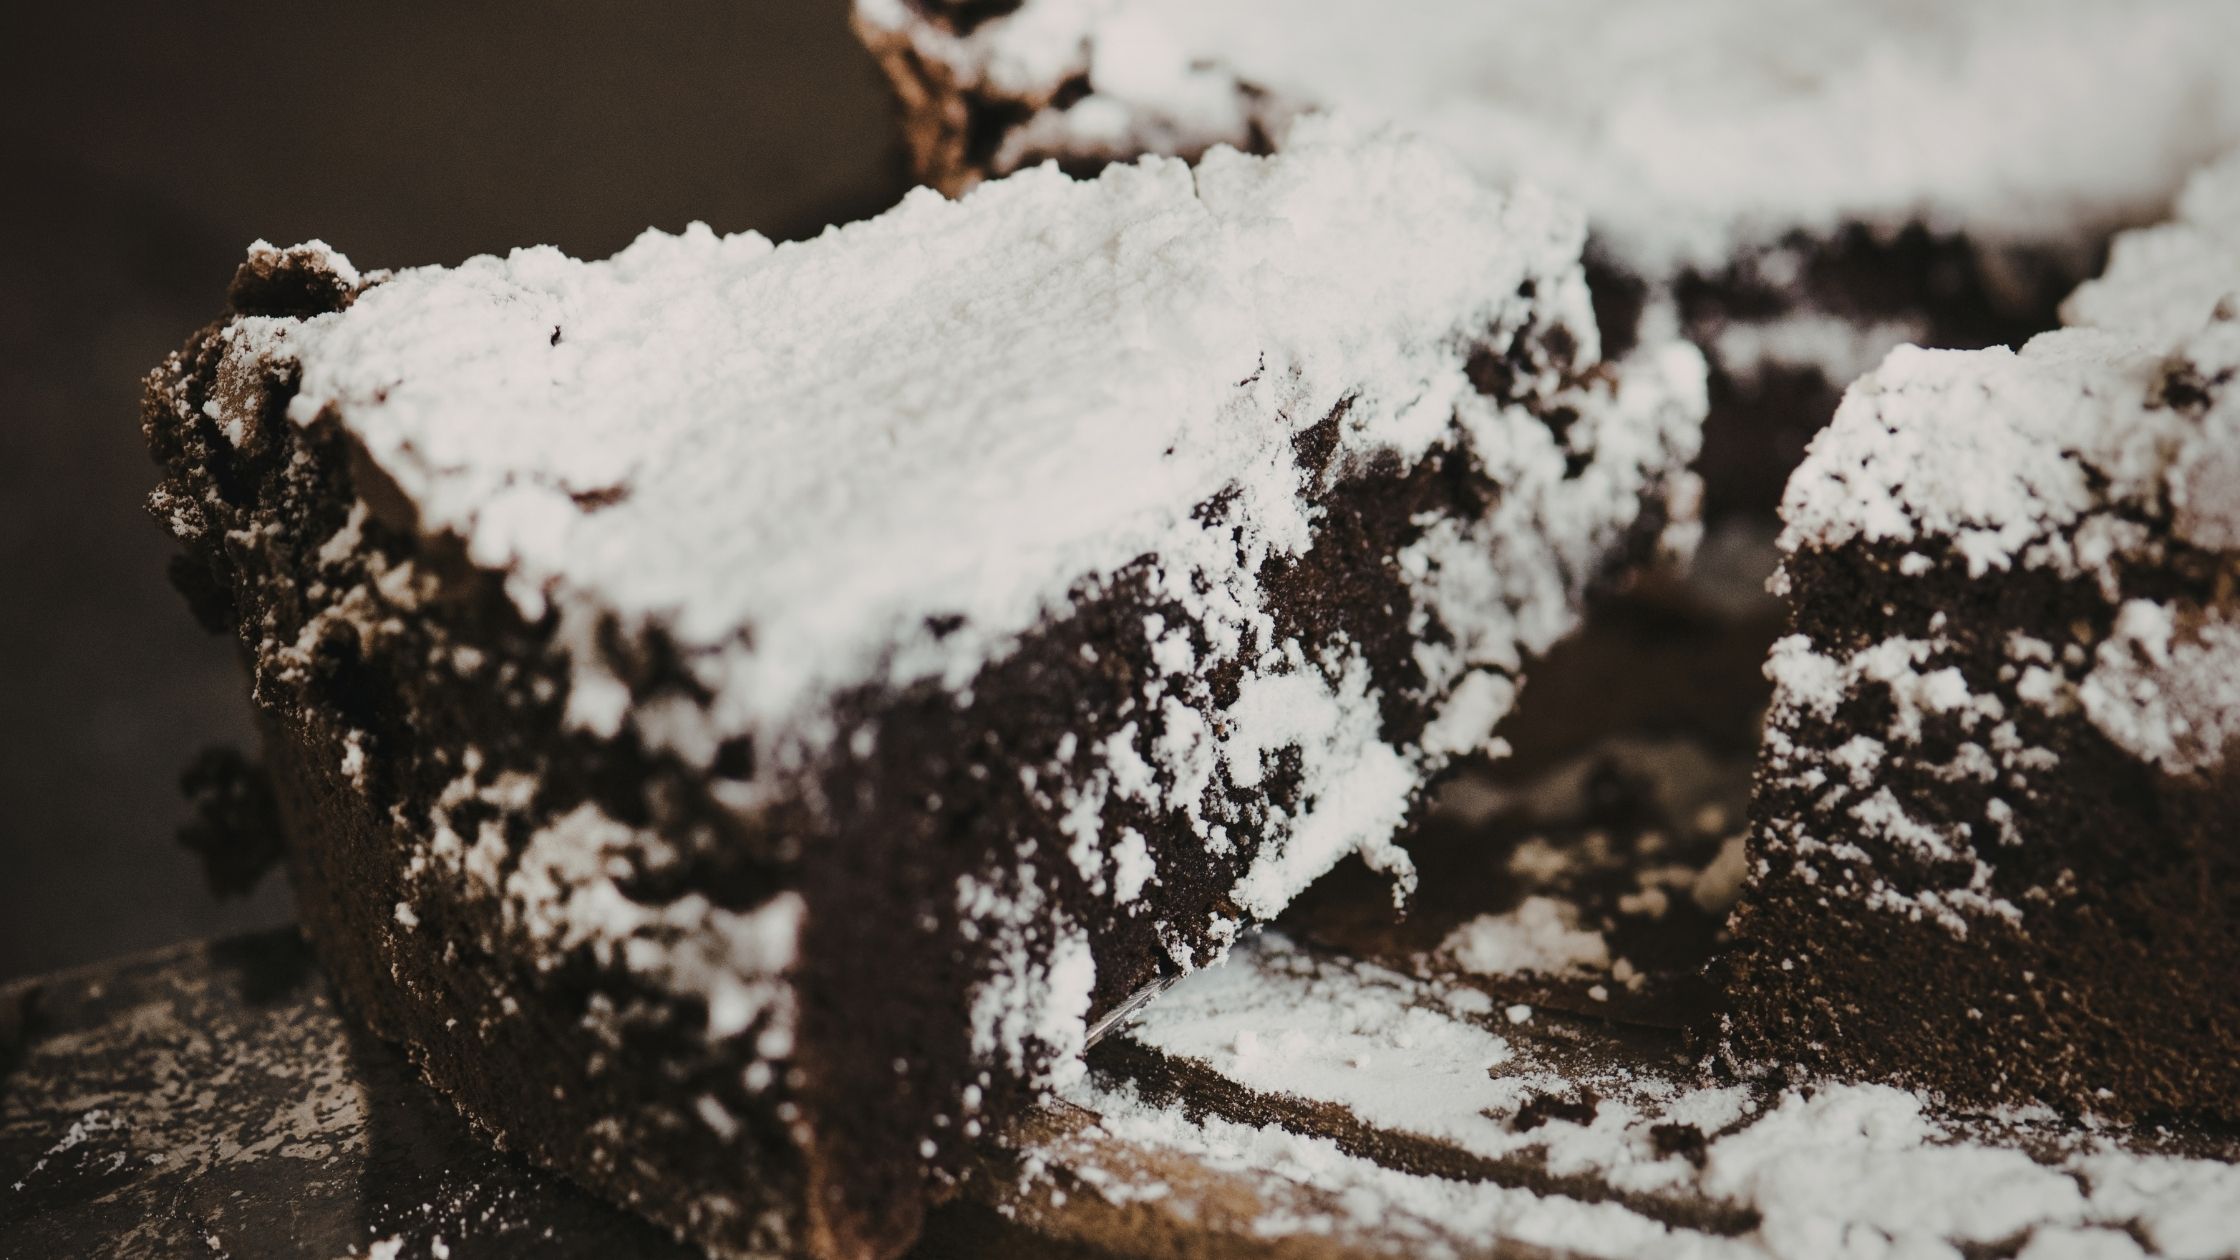
This is one of the simplest Halloween cake decorating techniques, and it’s ideal for beginners or last-minute party prep.
Instead of complicated frosting work, you create a clean design using contrast.
How to Do It:
- Bake and completely cool a round cake.
- Lightly frost the top with buttercream (optional but recommended for grip).
- Place a pumpkin-shaped cookie cutter or a Halloween-themed paper cutout in the center.
- Sieve powdered sugar evenly over the entire surface.
- Carefully lift the stencil straight up to reveal the design underneath.
Pro Tips:
- Make sure the cake is fully cooled before dusting.
- Use cocoa powder instead of powdered sugar for a darker effect.
- Try bat, ghost, or witch hat shapes for variety.
- For a rustic look, leave the sides unfrosted (a “naked cake” style).
This method works beautifully for home bakers who want something festive without investing in piping tools.
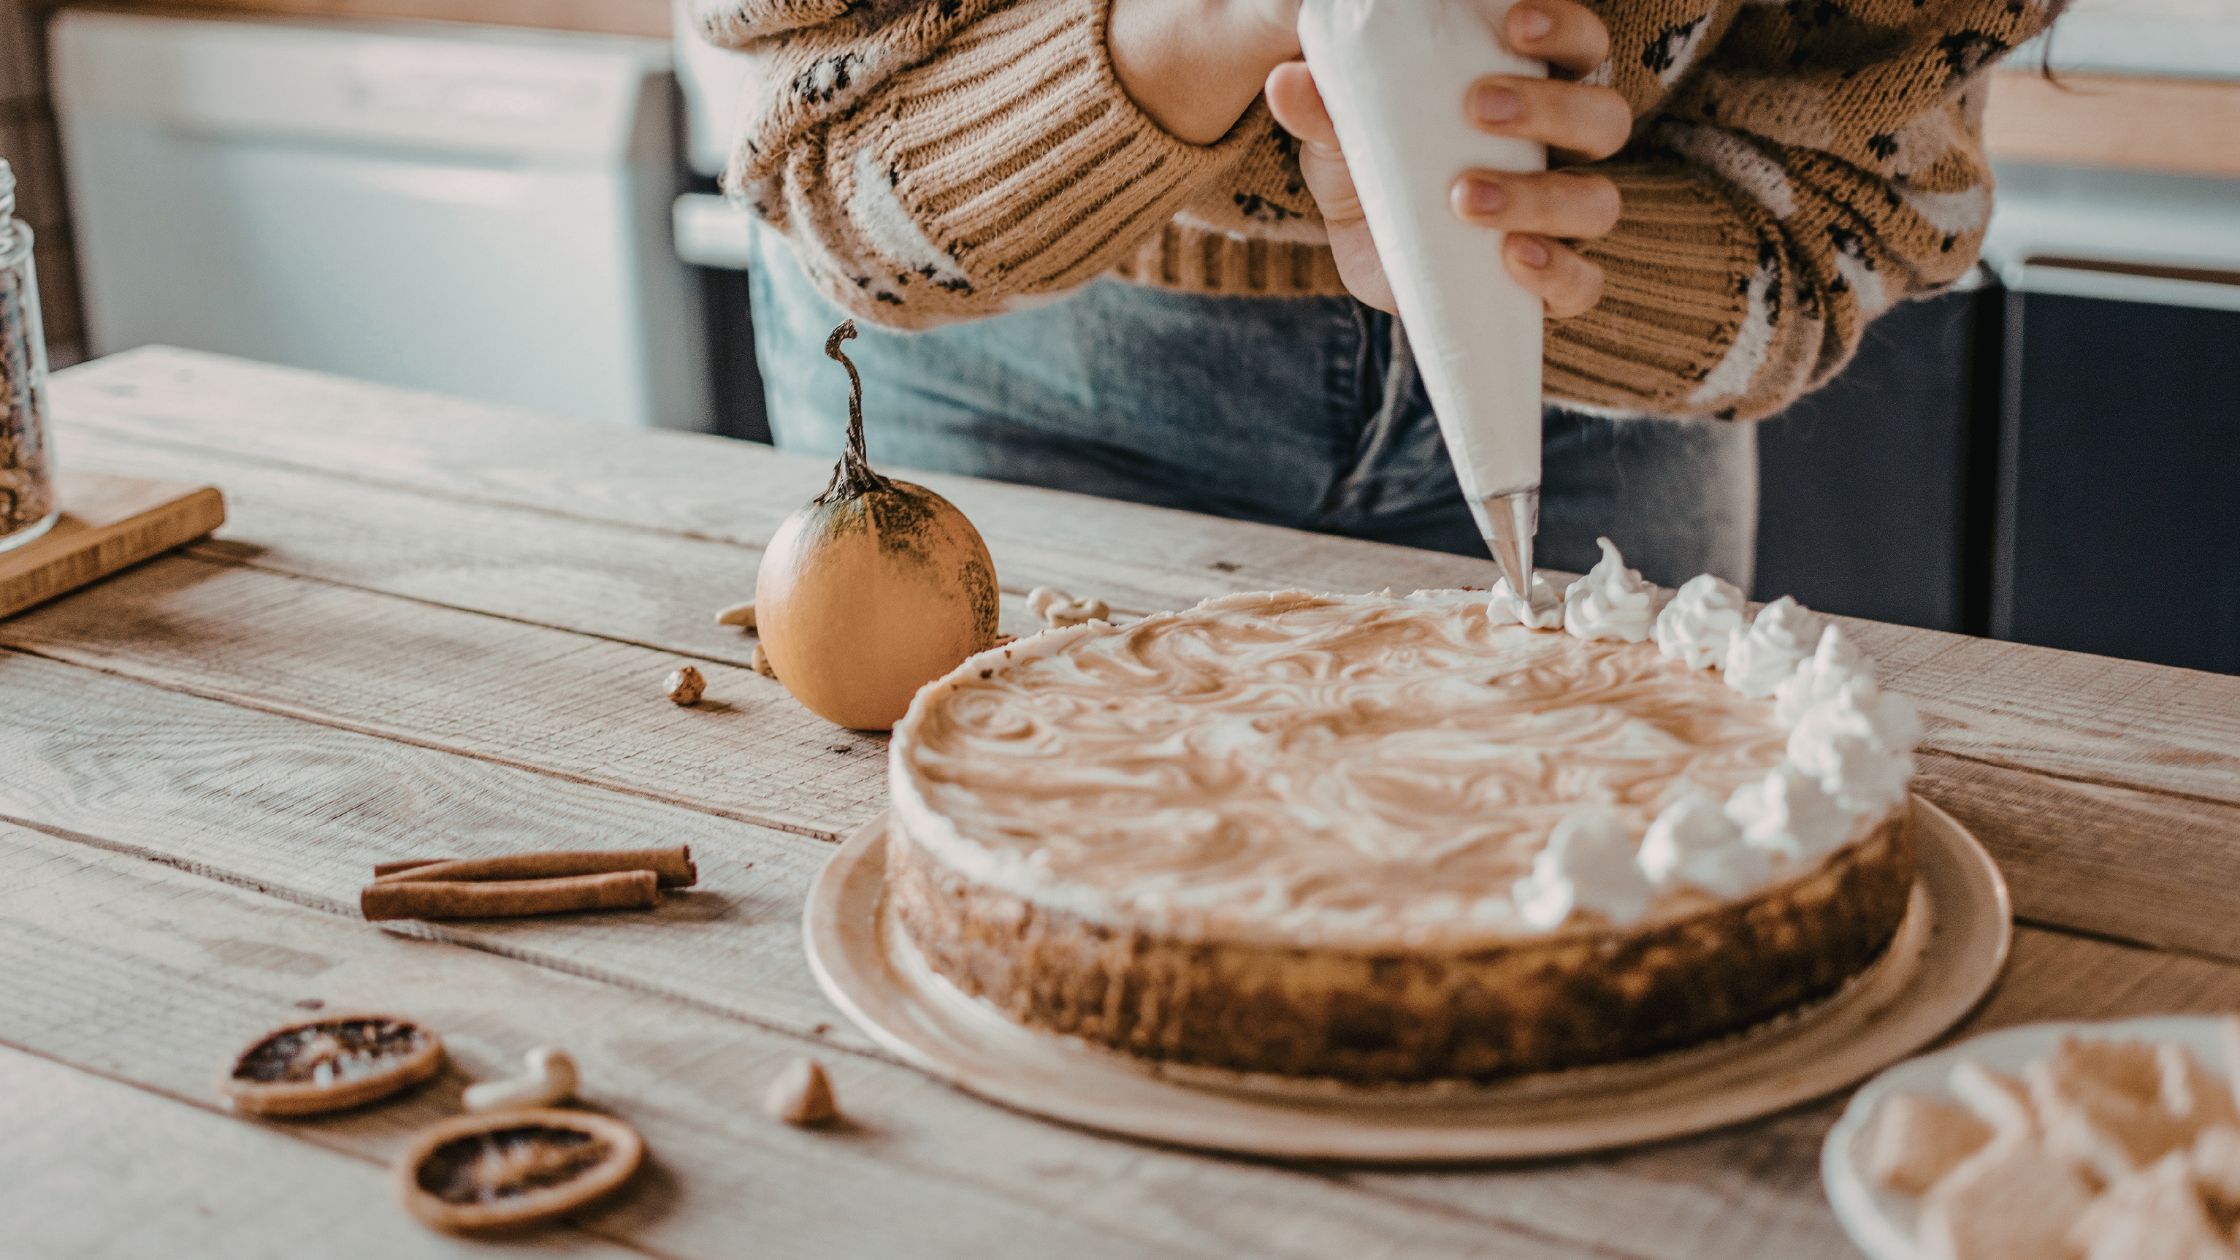
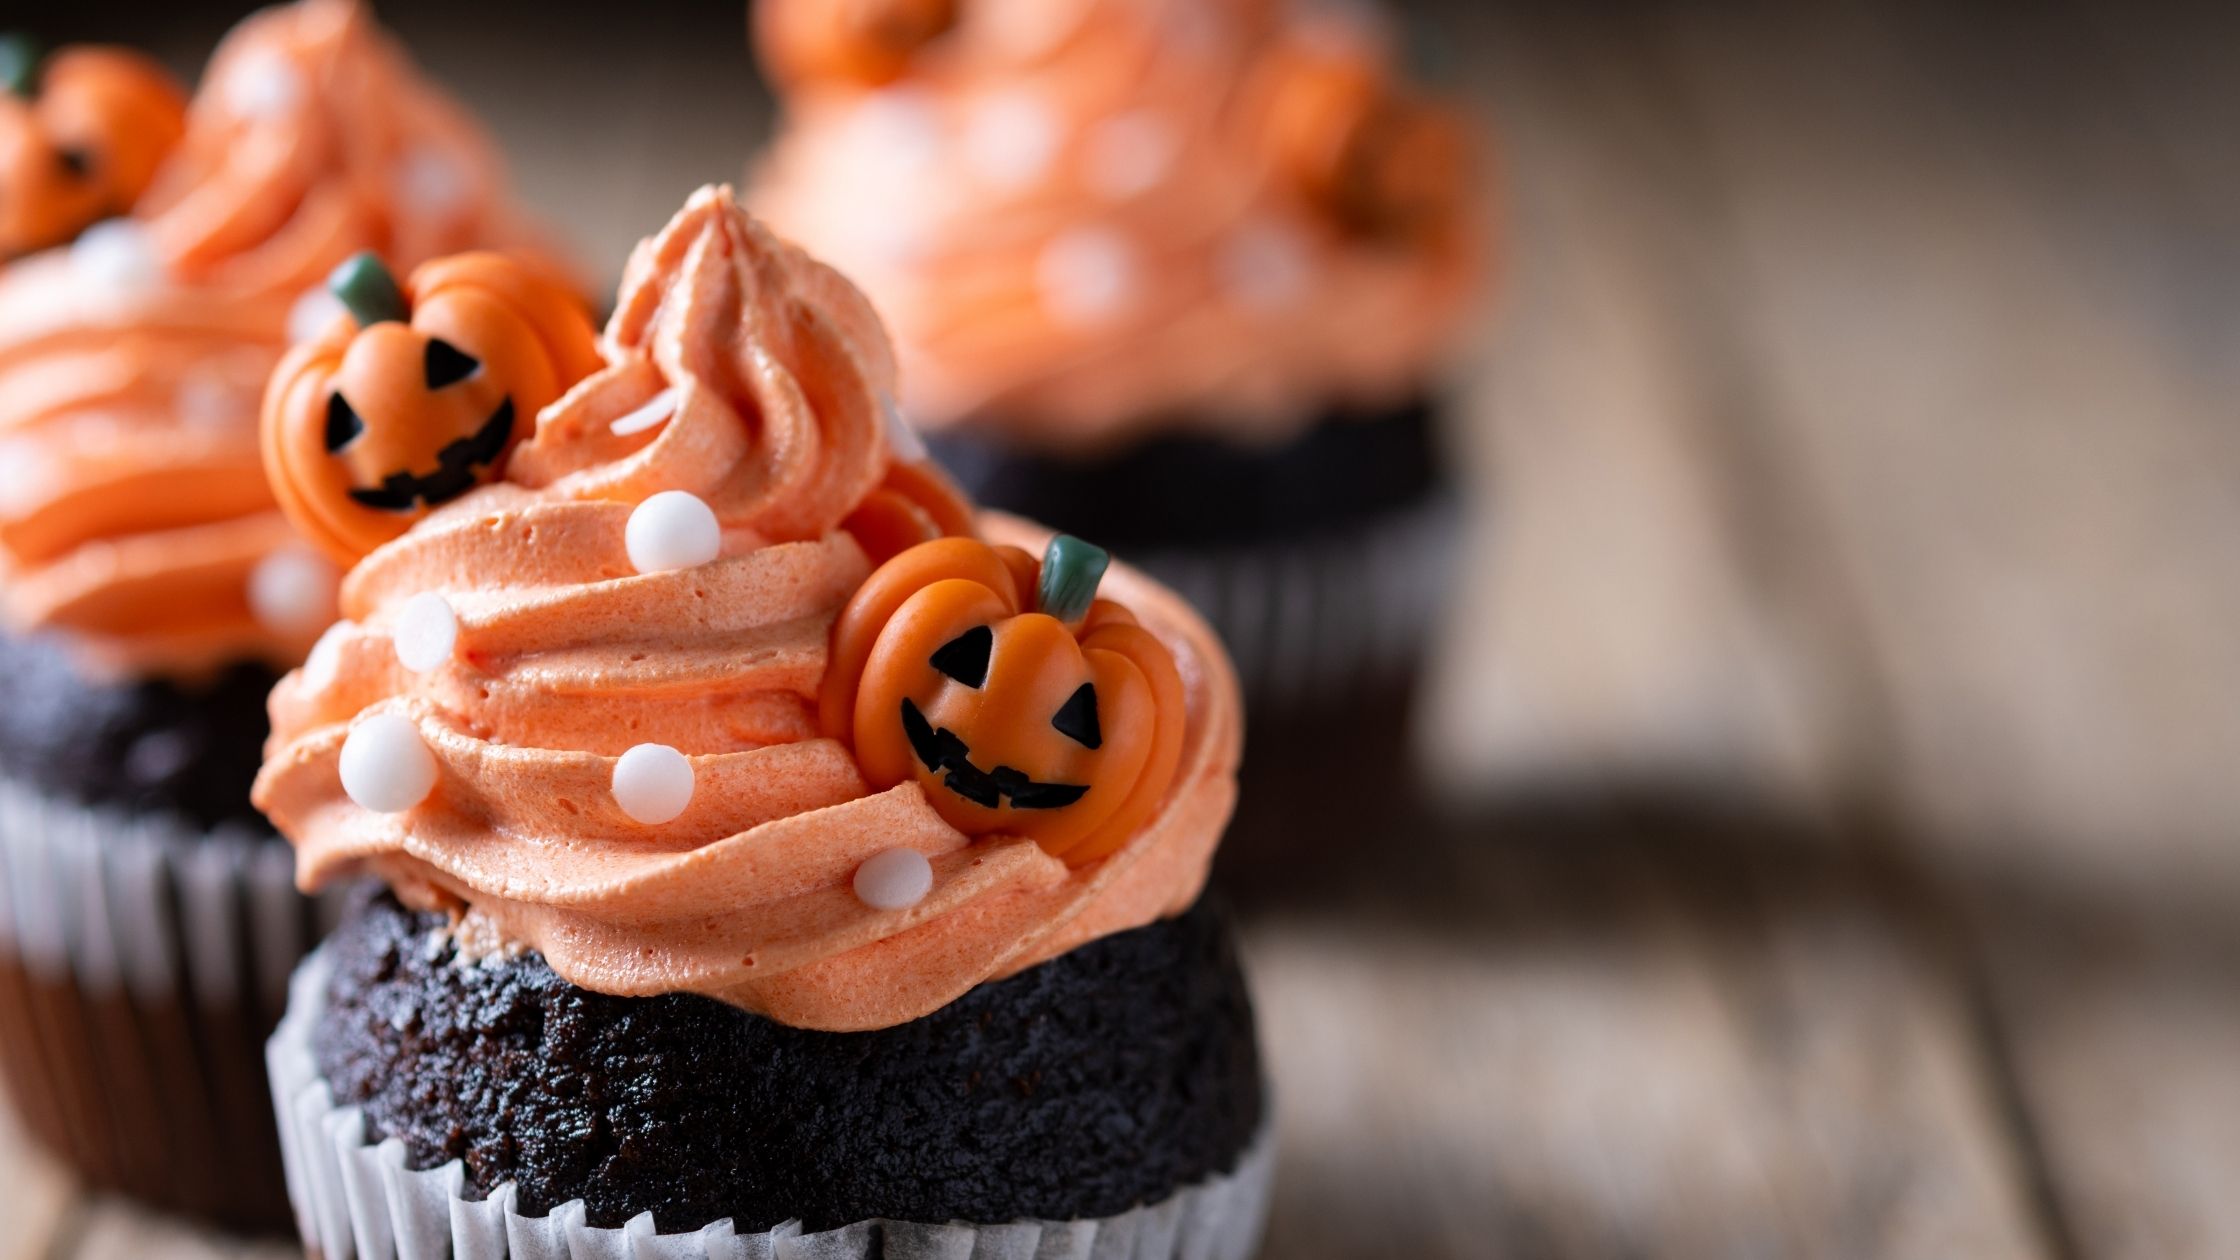
2. Simple Jack-O’-Lantern Face

If you want a classic Halloween look, nothing beats a traditional jack-o’-lantern face. It’s bold, recognizable, and incredibly easy to create.
You’ll Need:
- Orange buttercream frosting
- Black piping gel or chocolate frosting
- Small round piping tip
- Offset spatula
Step-by-Step Instructions:
- Frost the cake smoothly in bright orange buttercream.
- Use a spatula or spoon to gently create vertical lines to mimic pumpkin ridges.
- Pipe triangle eyes and a triangular nose.
- Add a wide grin with a snaggletooth for extra personality.
- Smooth any uneven edges with a toothpick.
Also read – how to decorate a chocolate cake for halloween
Design Variations:
- Make a friendly smiling pumpkin for kids.
- Create a scary jagged mouth for a spooky theme.
- Add eyelashes or eyebrows for character.
- Pipe green vines around the top edge.
Because this design is so versatile, it works for birthdays, classroom parties, or even adult Halloween gatherings.
3. Pull-Apart Cupcake Pumpkin
This idea is especially popular for kids’ Halloween parties because it’s easy to serve and avoids messy cake slicing.
Instead of one large cake, you create a pumpkin shape using cupcakes arranged together.
How to Arrange 24 Cupcakes:
- Row 1: 4 cupcakes
- Row 2: 5 cupcakes
- Row 3: 6 cupcakes
- Row 4: 5 cupcakes
- Row 5: 4 cupcakes
This creates a rounded diamond shape that resembles a pumpkin.
Decorating Steps:
- Place cupcakes tightly together on a large tray or cake board.
- Frost all cupcakes together using orange buttercream, treating them as one surface.
- Use a spatula to create gentle vertical pumpkin ridges.
- Add two green-frosted cupcakes at the top to act as the stem.
- Pipe leaves and vines between the stem and the pumpkin body.
Why It’s Perfect for Parties:
- No knife required.
- Easy portion control.
- Kids can grab individual cupcakes.
- You can mix flavors (chocolate, vanilla, pumpkin spice).
For extra fun, you can even pipe a jack-o’-lantern face across the cupcake surface.

Extra Tips to Make Your Pumpkin Cake Look More Realistic
Even simple designs can look professional with a few small enhancements:
- Mix a tiny bit of brown into your orange frosting for a natural pumpkin shade.
- Use a toothpick to sketch the face before piping in black.
- Chill the cake slightly before adding details for cleaner lines.
- Add edible glitter for a magical Halloween glow.
- Pipe small green tendrils using a leaf tip for a realistic vine effect.
These small details elevate the final result without requiring advanced skills.
Also read – How to Decorate a Cake for Graduation
How to Make a 3D Pumpkin Cake for Halloween
If you want a dramatic Halloween centerpiece, a 3D pumpkin cake delivers serious wow factor. Unlike flat round cakes, a sculpted pumpkin cake becomes a table focal point and instantly elevates your party décor.
Whether you prefer an easy stacking method or a fully carved design, these techniques will help you create a realistic, eye-catching pumpkin cake that looks bakery-made.
1. Double Bundt Method (Most Popular & Beginner-Friendly)
This is the easiest and most reliable way to create a realistic pumpkin shape without complicated carving. The natural curves of a Bundt pan already resemble pumpkin ridges, which makes decorating much simpler.
How It Works:
- Bake two Bundt cakes (same flavor and size).
- Allow them to cool completely.
- Trim the domed tops flat so they sit evenly.
- Spread frosting on one flat side.
- Stack them flat-side together to form a sphere.
- Crumb coat the entire cake and chill for 20–30 minutes.
- Apply a final layer of orange buttercream.
- Insert a green-frosted mini cupcake or an upside-down ice cream cone into the center hole as the stem.
How to Make It Look Realistic:
- Use an offset spatula to enhance vertical ridges.
- Blend darker orange or light brown into the grooves for depth.
- Add green buttercream vines using a small leaf piping tip.
- Slightly roughen the frosting surface for a natural pumpkin texture.
Stability Tips:
- Use thick buttercream or ganache between layers.
- Insert one or two dowels if the cake feels unstable.
- Chill the cake before final decorating to prevent sliding.
Make It Even More Fun:
Before stacking, hollow out the center slightly and fill it with candies like:
- Reese’s Pieces
- Candy corn
- Chocolate chips
- Mini marshmallows
This creates a surprise center that spills out when sliced.
2. Sphere Cake Pan Method (Perfectly Round Pumpkin)
If you want a smoother, more symmetrical pumpkin, using two half-sphere pans is ideal. This method creates a clean round shape that’s easy to decorate in different styles.
Step-by-Step:
- Grease and line two half-sphere pans.
- Bake and cool completely.
- Trim edges so both halves sit flat.
- Fill and stack the two halves.
- Apply a crumb coat and chill.
- Frost smoothly in orange buttercream.
Creative Variations:
- Add black licorice lace and insert a lollipop stick to create a “trick-or-treat pail” handle.
- Pipe a smiling jack-o’-lantern face for a playful look.
- Add edible gold dust for a glamorous Halloween theme.
Why This Method Works Well:
- A smooth surface makes piping faces easier.
- Great for cartoon-style pumpkins.
- Ideal for kids’ birthday Halloween parties.
Also read – how to decorate a cake for halloween
3. Carved Layer Pumpkin Cake (Advanced & Most Realistic)
If you want a bakery-style, ultra-realistic pumpkin, carving stacked cake layers gives you full control over the shape.
This method requires more patience but produces stunning results.
How to Do It:
- Bake four 6-inch round cake layers.
- Stack them with frosting between each layer.
- Chill the stacked cake until firm.
- Use a serrated knife to gently carve a domed, slightly tapered pumpkin shape.
- Remove excess cake slowly to avoid over-cutting.
- Apply a crumb coat and chill again.
- Frost with orange buttercream.
- Use a palette knife to carve vertical grooves.
Professional Finishing Techniques:
- Blend darker orange or brown in the ridges.
- Use a small brush to dust edible cocoa powder for shading.
- Add realistic green fondant leaves.
- Create a textured fondant stem for authenticity.
This technique creates the most realistic pumpkin appearance and works beautifully for centerpiece cakes.
Add a Surprise: Candy-Filled Pumpkin Cake
Want to impress your guests and create a “wow” moment?
A candy-filled pumpkin cake adds interactive fun and makes slicing the cake part of the entertainment.
How to Create the Surprise Center:
Before stacking your cake layers:
- Use a round cutter to remove the center of the middle layers.
- Leave the top and bottom layers intact.
- Stack the layers carefully.
- Fill the hollow cavity with candies.
Candy Ideas:
- M&Ms
- Gummy worms
- Candy corn
- Reese’s Pieces
- Mini chocolate eyeballs
- Halloween sprinkle mixes
When you cut into the cake, the candies spill out dramatically, which kids absolutely love.
Important Tips:
- Don’t overfill, or the cake may bulge.
- Chill the cake before slicing for cleaner results.
- Use slightly thicker frosting to hold structure.

Which 3D Method Should You Choose?
Beginner: Double Bundt Method
Intermediate: Sphere Pan Method
Advanced: Carved Layer Pumpkin Cake
Each method can be customized to look spooky, cute, rustic, elegant, or even glam depending on your party theme.
Creative Halloween Accents for Pumpkin Cakes
Once your pumpkin cake is frosted and shaped, it’s time to elevate it from simple to spectacular. The right accents can transform your cake into a full Halloween showpiece. Whether you prefer cute and playful or dark and spooky, these decorative elements add personality, texture, and visual drama.
Chocolate Ghost Toppers
Chocolate ghosts are easy to make, affordable, and instantly festive. They work beautifully on both flat cakes and 3D pumpkin cakes.
How to Make Chocolate Ghosts:
- Melt high-quality white chocolate in short intervals, stirring until smooth.
- Line a tray with parchment paper.
- Spoon small oval shapes onto the parchment.
- Gently drag the spoon downward to create a flowing “ghost tail.”
- Chill in the refrigerator until fully set.
- Use edible icing pens or melted dark chocolate to draw eyes and mouths.
- Carefully peel them off and press gently into your cake frosting.
Pro Tips:
- Use candy melts if you want firmer toppers.
- Add tiny pink blush dots for a cute ghost look.
- Create different facial expressions for variety.
- Make extra ghosts in case some break while lifting.
These toppers instantly add spooky charm without requiring advanced cake decorating skills.
Edible Halloween Scenery
If you want your pumpkin cake to feel like a miniature Halloween world, edible scenery is the way to go. This technique works especially well for 3D pumpkin cakes placed on large cake boards.
Decorate the Base with:
- Crushed Oreo cookies to resemble dark dirt or graveyard soil.
- Black candy melts piped into haunted house silhouettes.
- Piped tombstones and spooky trees using chocolate or stiff buttercream.
- Green buttercream vines using a leaf piping tip.
- Candy pumpkins or edible eyeballs are scattered around the base.
How to Create a Haunted Scene:
- Spread a thin layer of frosting on the cake board.
- Press crushed cookies into the frosting.
- Insert chocolate decorations upright into the frosting.
- Pipe vines are creeping up the pumpkin for a creeping effect.
This transforms your cake into a full Halloween display rather than just a dessert.
Buttercream Tips for a Realistic Pumpkin Look
Even a simple pumpkin cake can look professional if you focus on texture and shading. Real pumpkins are not flat or uniformly colored they have dimensions, ridges, and subtle variations.
Here’s how to recreate that naturally:
Add Depth with Color Blending
- Mix a tiny amount of brown into your orange buttercream for a richer pumpkin tone.
- Apply a darker orange between ridges for shadowing.
- Lightly brush edible cocoa powder into grooves for realism.
- Blend using a clean spatula for a seamless gradient.
Create Pumpkin Ridges
- Use a palette knife or the back of a spoon.
- Drag vertical lines from top to bottom.
- Space them evenly around the cake.
- Slightly press deeper between sections to define structure.
Pipe Textured Vines and Leaves
- Use a small star tip for curly vines.
- Use a leaf tip for realistic leaves.
- Pipe in quick pulling motions for natural shape.
- Add darker green near the base of leaves for dimension.
Layering color and texture makes the cake look more dimensional, realistic, and bakery-quality.
Tools You May Need
Having the right tools ready before decorating makes the entire process smoother and less stressful.
Essential Tools Checklist:
- Offset spatula (for smooth frosting)
- Serrated knife (for carving and leveling)
- Piping bags and assorted tips
- Leaf tip and star tip
- Orange, green, and brown food coloring
- Black piping gel or melted chocolate
- Bundt or round cake pans
- Powdered sugar sieve
- Cake turntable (optional but helpful)
- Toothpicks for sketching designs
Preparing your tools in advance helps you decorate confidently without interruptions.
Pumpkin Cake Decorating Ideas by Skill Level
No matter your experience level, there’s a pumpkin cake style that fits your comfort zone.
Beginner
- Powdered sugar stencil design
- Simple jack-o’-lantern face
- Pull-apart cupcake pumpkin
These require minimal carving and basic piping skills.
Intermediate
- Double Bundt 3D pumpkin with stem
- Candy-filled center
- Basic shading and textured vines
This level involves stacking and some structure awareness.
Advanced
- Fully carved 3D pumpkin cake
- Detailed buttercream shading
- Hand-piped haunted scenery
- Realistic fondant leaves and stems
- Dramatic candy explosion center
These designs require carving precision and advanced piping techniques.
Key Takeaways
- Frost with orange buttercream for an authentic pumpkin look.
- Add vertical grooves to mimic pumpkin ridges.
- Use black icing to create a jack-o’-lantern face.
- Stack Bundt cakes for an easy 3D pumpkin shape.
- Add candy filling for a fun Halloween surprise.
- Enhance with ghosts, vines, and edible scenery for extra impact.
Final Thoughts
Decorating a pumpkin cake for Halloween can be as simple or elaborate as you want. Whether you prefer a quick stencil design or a show-stopping 3D candy-filled jack-o’-lantern, the key is layering color, adding texture, and embracing festive details.
With these techniques, you can confidently create a Halloween pumpkin cake that looks stunning and tastes even better.